Hello everyone! Today we’ll be talking about POP! How to get that
cool POP factor to your photos (Leslie mentioned it briefly last week
with the B&W photos, but I thought we’d talk it over in a bit more
detail!).

Ok, there are many different ways to do it (including using actions
that do it for you!) but this is my favorite way! Now, I use Photoshop
CS and it’s really the only program I know, so hopefully you can adapt
this process to work with yours…if not, then brightness, contrast &
saturation are your friends!
First-get your photo pulled up. Now duplicate your photo layer
(press ctl+j or drag your layer onto the icon that looks like a piece
of paper or go to layer>duplicate layer). Change the blending mode
to Screen. Adjust the opacity of the layer to your liking. If your
photo is really dark, you may need to duplicate the Screen layer one
more time & then adjust the opacity on the second one. After your
photo is as light as you want it, then duplicate the layer one more
time and change the blending mode to Overlay, again adjust the opacity
til you like it. Ta-Da! It’s as EZ as that! Here’s a sample–

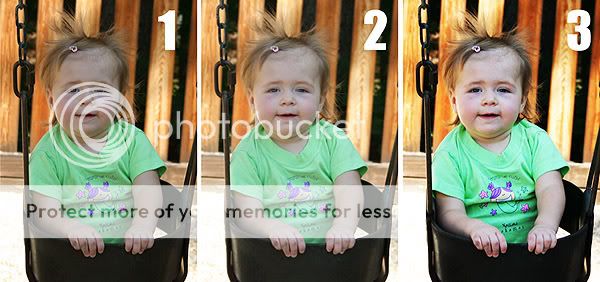
#1 = original phto
#2 = original + screen layer (I used 60% opacity) –> brightens it nicely but still lacking the POP
#3 = original + screen layer (I used 60% opacity) + overlay layer (i used 67% opacity) –> now I think THAT is better!
Now the opacities will always be different depending on your photo.
So you have to just tweak each photo to make it look the best and play
around with the different blending modes & saturation too!
Here’s a screen shot if that helps–it may sound confusing, but it’s super easy!

Play with that & see what you come up with! When you are ready
to tackle more-try these tips too or just play around on your own! You
can get some fab results!
Now let’s see how to adapt that to get a cool old-timey faded kind of look–

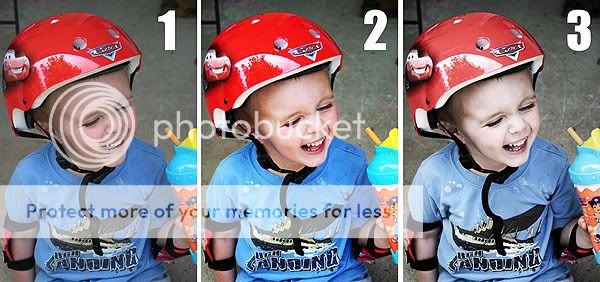
#1 = original photo
#2 = original + screen layer (51% this time) + overlay layer (100% this time)
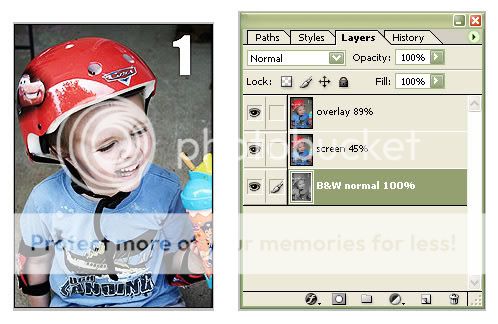
#3 = same as #2 except after i made the 2 duplicated layers I
changed the bottom layer to B&W (shift+ctl+u or
image>adjust>desaturate) then tweaked the opacities of the top
layers a little (this time I used 45% on my screen layer and 89% on my
overlay layer–see screen shot below).

And just one more to show how great it is on B&W too–

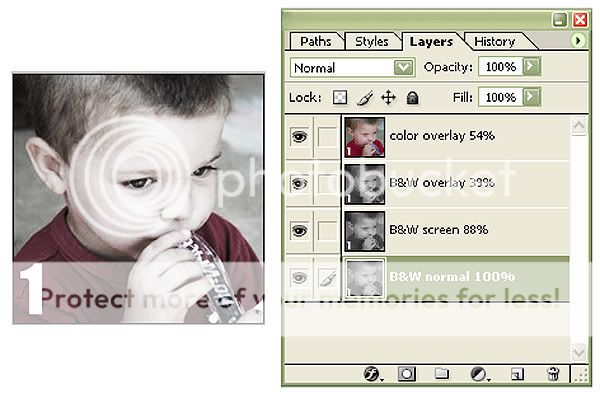
#1 = original
#2 = original layer desaturated (shift+ctl+u or
image>adjust>desaturate) + screen layer (dulpicate of the b&w
layer) I used 65% this time + overlay layer (another dulpicate of the
b&w layer) I used 69%.
#3 = same as #2 except I had an extra overlay layer on top that was
still in full color ( so I had a B&W bottom layer + B&W screen
layer set to 88% + B&W overlay layer set to 39% + original color
layer on top set to overlay at 54%, see screen shot below)

Have fun, hope this is useful to you!